PIN IT NOW - SAVE IT FOR LATER
PURCHASE THE AD FREE DOWNLOADABLE PDF HERE ON: RAVELRY, ETSY
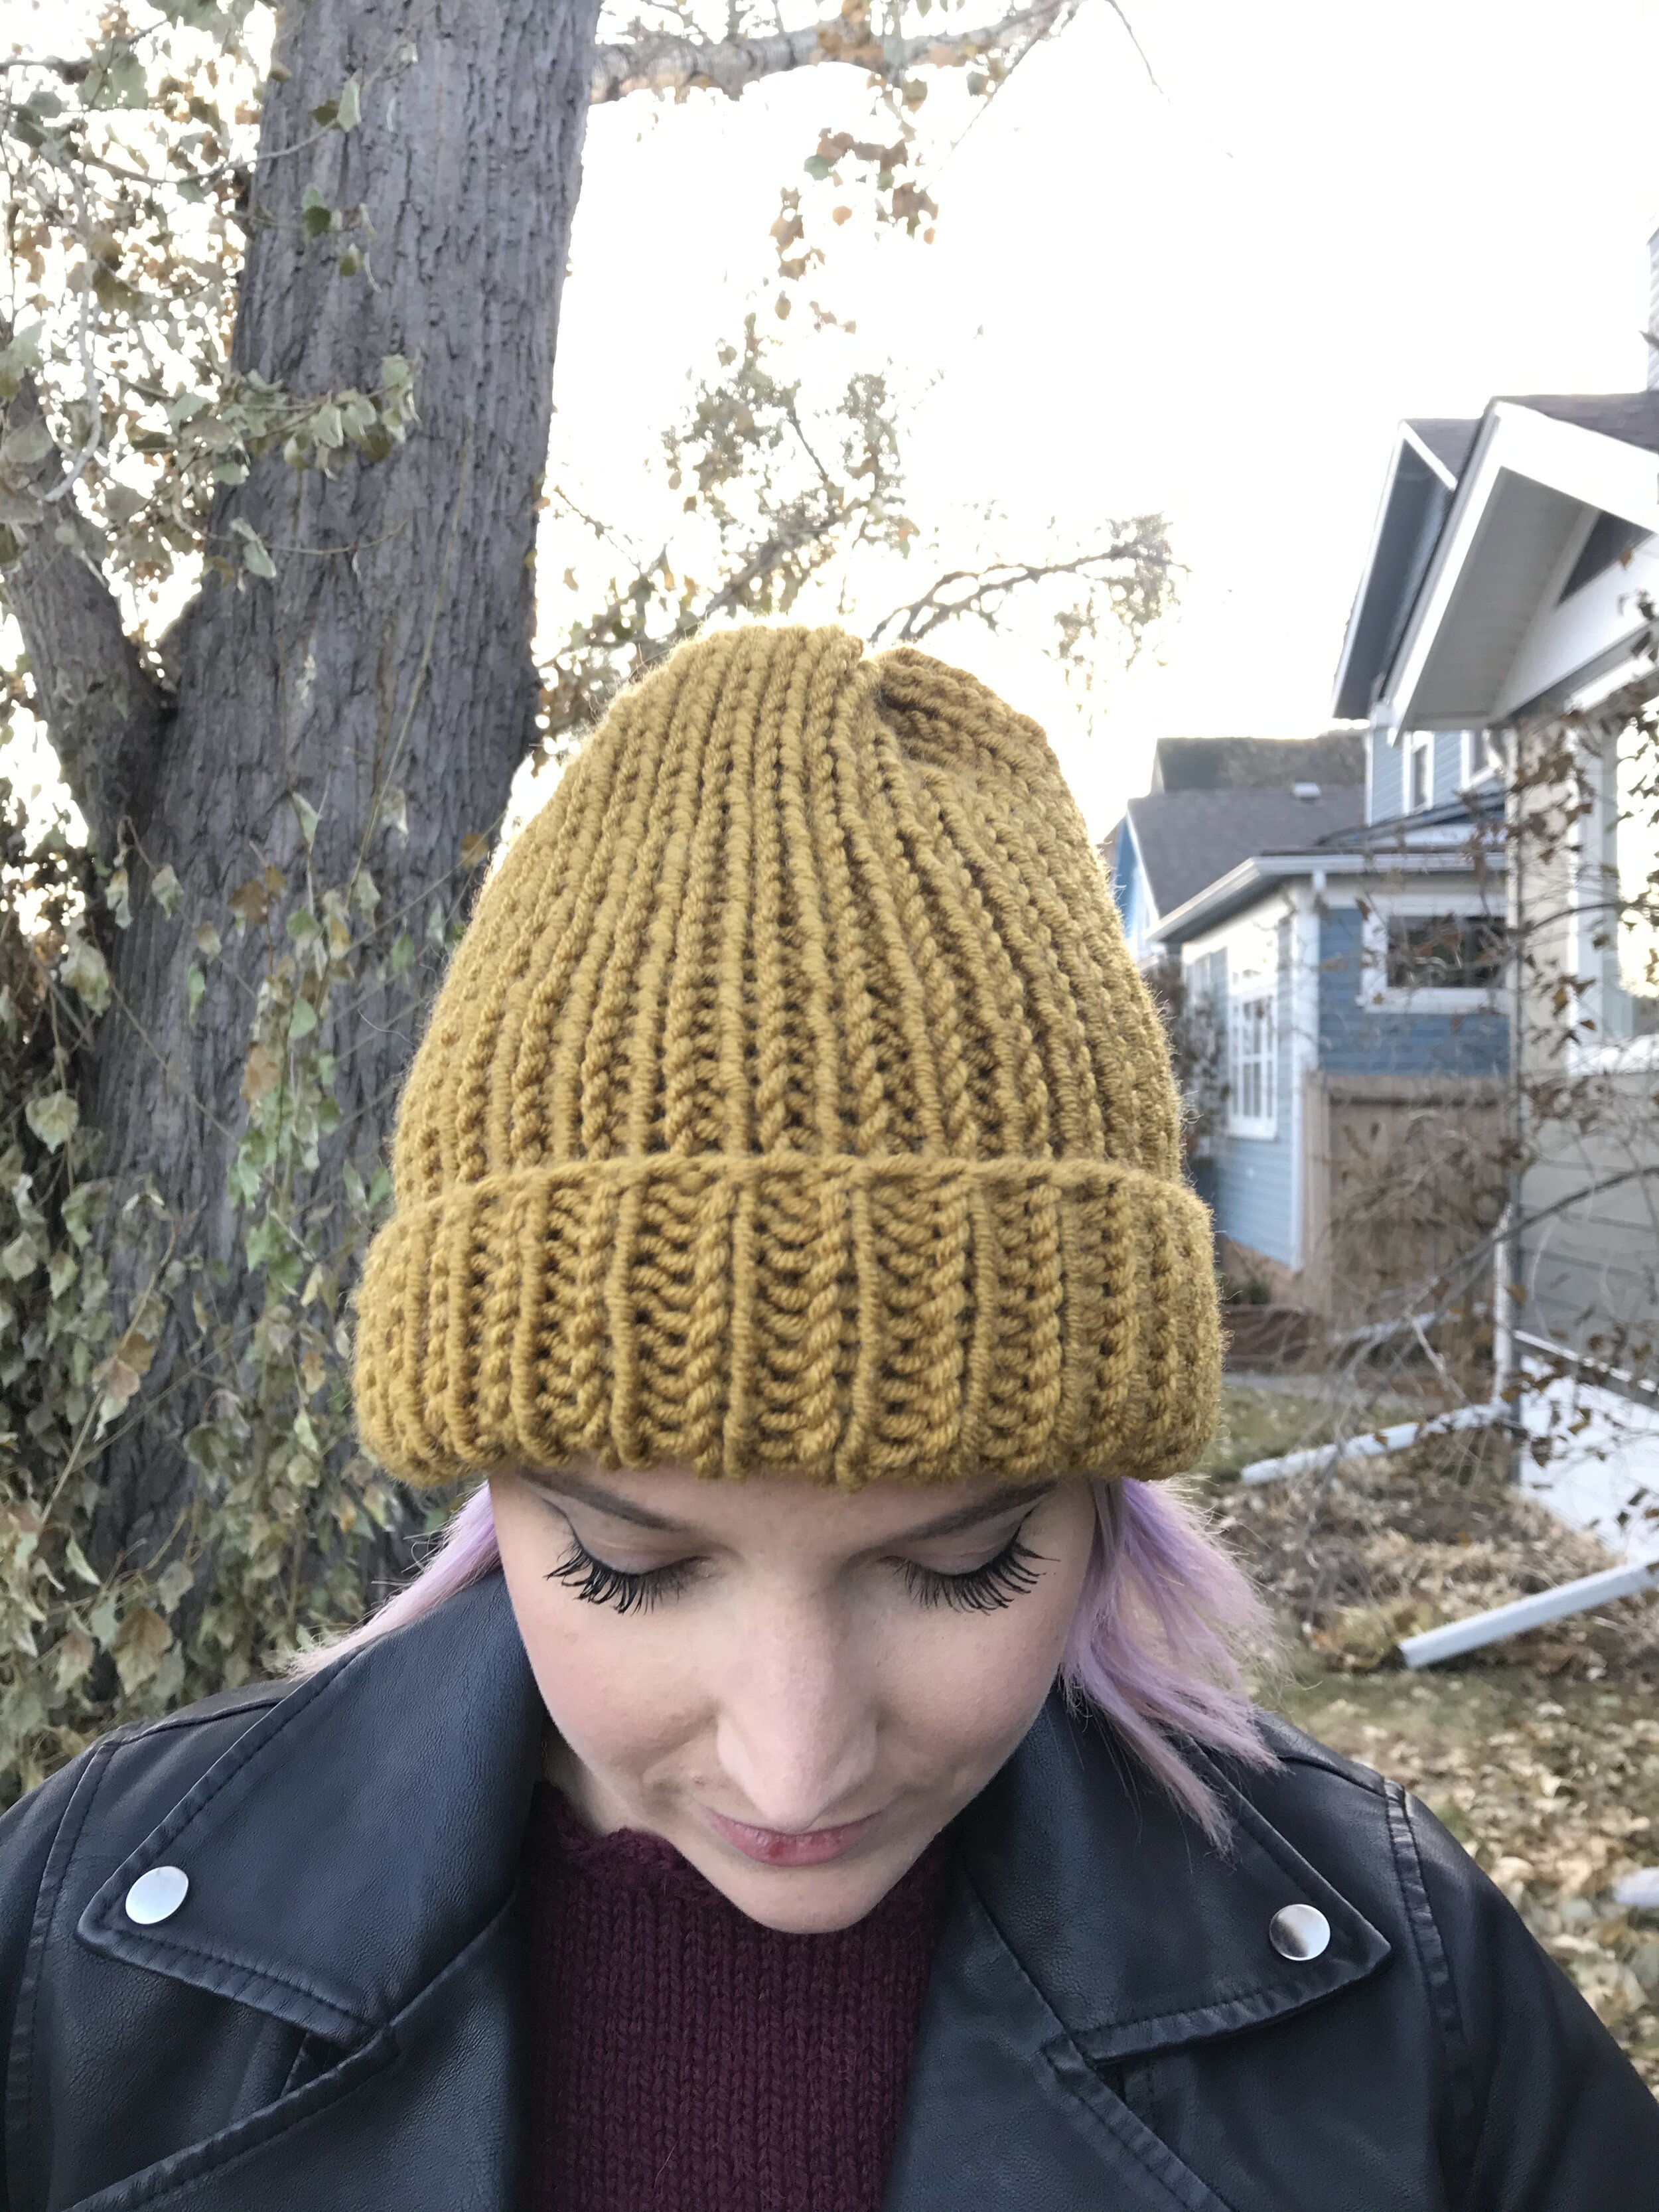
KNIT A SPINELLI HAT - FREE PATTERN
You know when you have grande ideas of what to be for Halloween… and then you just forget about it till the last minute? That is me every year. This year is no different, but instead of the night before, it was the weekend when I started contemplating my outfit.
If you don’t know… my dogs name is also Spinelli! When we were getting her, we were told that her name was “Silver”, but when we found out she had a tomboy attitude, we immediately had to switch it to one of my husbands and my favourite characters of the Disney show Recess = Spinelli.

The yarn I used for this pattern is sadly discontinued (RIP my long lost love Lionbrand Woolspun), but it could easily be replicated with another size 5 bulky yarn. A perfect swap would be: Lionbrand Color Made Easy - in either Gold Dijon Yellow or Kombucha.
I’ve always wanted to do a family costume but we’ve never gotten a chance, mainly because Todd isn’t a fan of dressing up. Either way, wanting to make a #SpinnelliHat of your own? Follow below:
MATERIALS
1 ball of Lion Brand Woolspun or approximately 116m/127 yds of another bulky yarn, category 5 (I suggest Color Made Easy!)
• Size US 10.5/6.5 mm circular needles, 16”/40 cm long
• 1 BOR stitch marker
• Scissors
• Darning needle

ABBREVIATIONS
CO = Cast On
K = Knit
P = Purl
K2tog = Knit Two Together
BOR = Beginning of row marker
PM = Place Marker
SM = Slip Marker
Sts = Stitches
BO = Bind Off
GAUGE
Knit in 1x1 rib
16sts X 17 rows = 4”
PATTERN
On US 10.5/6.5mm needles CO 64 sts
R1: Joining in the round, place BOR, *K1, P1*. Repeat from * to * until the end of round
R2: *K1, P1*. Repeat from * to * until the end of round
Repeat round 2 until you reach 10.5 inches in length. If you want a longer and more slouchy hat, add an additional 1-2 inches in length.

SHAPING THE CROWN
R1: *K2tog*, repeat from * to * until the end of round. You will have 32 sts.
Leaving a 4 inch tail, cut your working yarn. Thread your tail through all the live loops and cinch to close. Secure it on the inside of your hat, and weave in ends. Now flip up the brim and put on your hat. You’ve now finished your #SpinelliHat - you look great!
NOTES
Don’t forget to tag me on instagram and your social media and use the hashtag #SpinelliHat so I can see your finished pieces! If you have any questions, please feel free to send me an email at knitatude@gmail.com, or hit me up on social media at:
Instagram - @knitatude
Facebook – www.facebook.com/knitatude
Etsy – knitatude.etsy.com
POLICIES
Spinelli Hats created using this pattern may be sold with written consent first given by Chantal Miyagishima of Knitatude. Credit must be given to Knitatude / knitatude.etsy.com. Pattern and photos can not be used for resale purposes.
Please share your work with the hashtag #knitatudeknits and #SpinelliHat to share the handmade love!
THE END LOOK

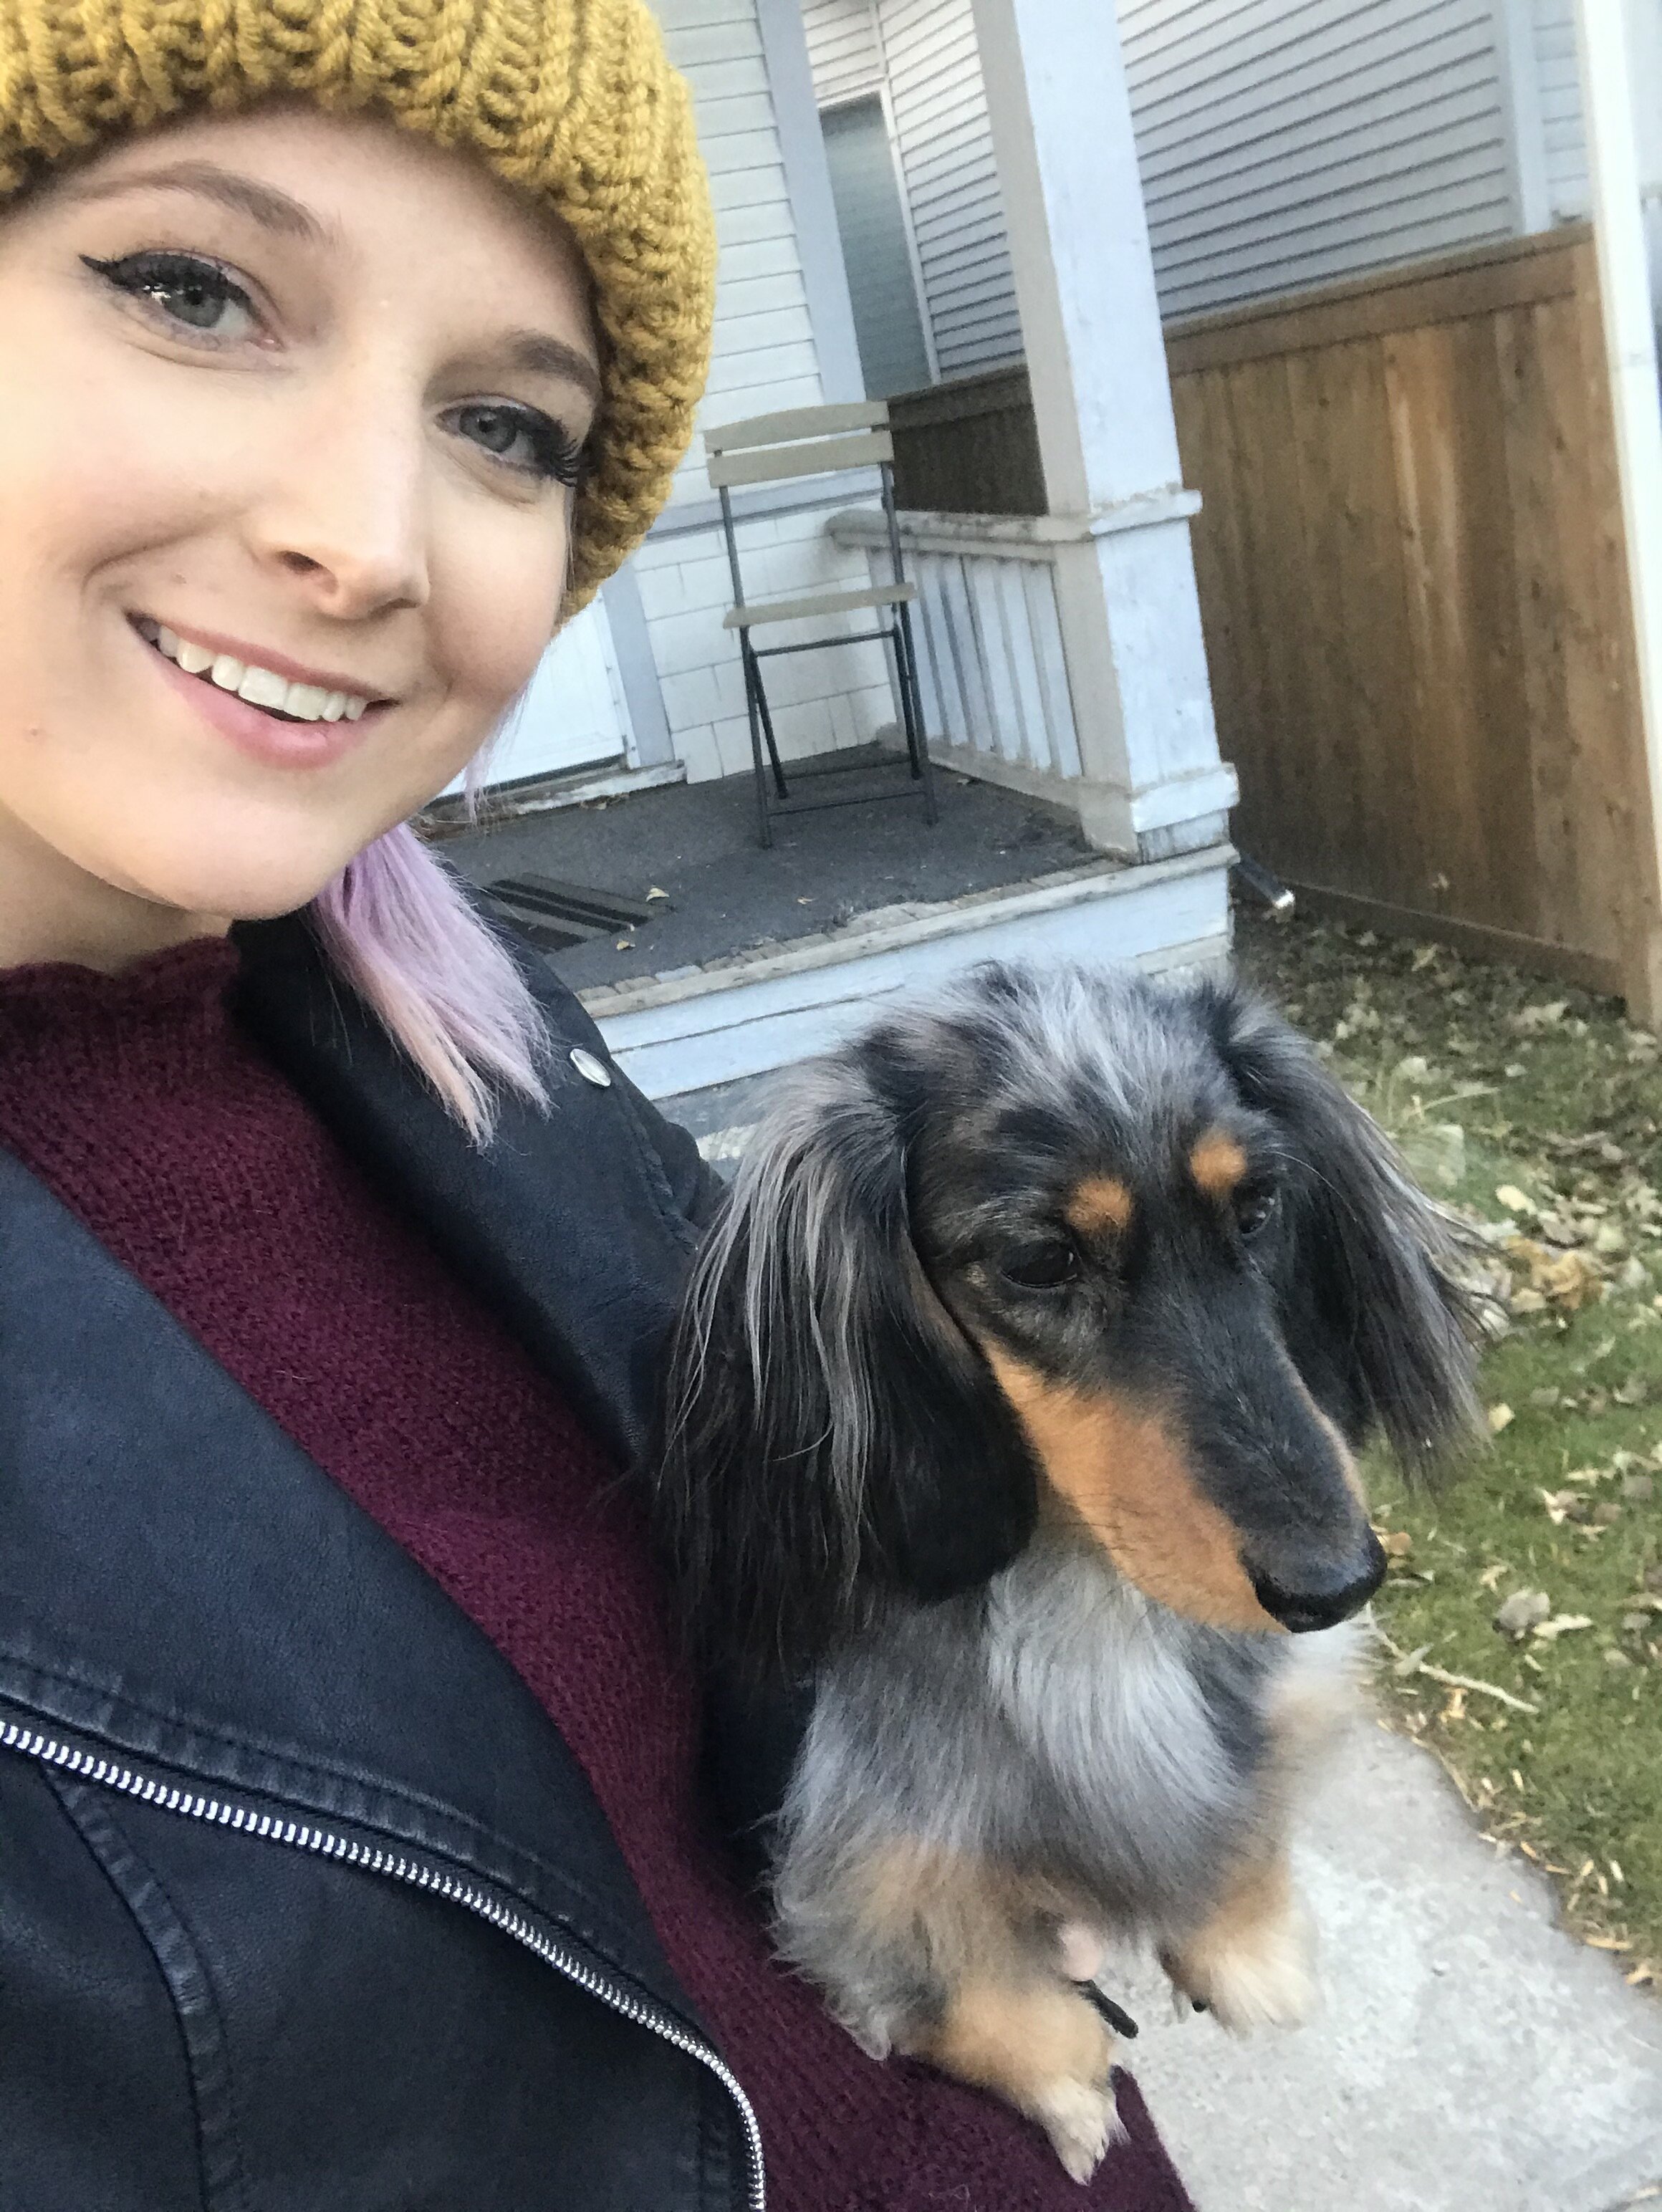

So here it is, the finished look. In the cartoon she wears a red shift dress, leather jacket, combat boots and some striped red and orange tights.
Instead I used:
Dress: My Seaside Scallop Dress (Find the pattern here on Etsy and Ravelry, and the blog post here to all the kit links)
Leather Jacket: That I had from my trip to Europe
Boots: From that I had from Aldo
Tights: I didn’t have striped tights, so I just went with black knee highs.
Makeup: I added a massive black winged liner and put my hair in pigtails.
Happy knitting!